DIY Home Decor: What Goes Wrong First (and How to Fix It)


The gallery wall took a Saturday. It also took eleven holes in the wall before the frames hung where I wanted them.
The frames look fine now. The eleven test holes are behind them, patched and painted. Nobody who visits knows. But I know — because if I'd spent twenty minutes with paper templates taped to the wall first, the whole thing would have taken three hours instead of seven. That's the DIY version of expensive: not money, but time spent fixing the part you skipped.
Every list of "easy DIY home decor ideas" skips that part. Here's the list that doesn't.
The First Mistake Almost Everyone Makes
It's not choosing the wrong project. It's choosing without a sequence.
Most people start with whatever frustrates them most — a blank wall, dated hardware, a corner that collects clutter — and they address it without thinking about what order problems should be solved in. So they paint an accent wall, then decide to hang floating shelves over it, then drill into the fresh paint and realize the stud is six inches off from where the shelf looks best. Or they buy a new lamp before fixing the fact that their furniture arrangement means nobody sits near the one outlet in the room.
This isn't failure. It's just the wrong order.
The sequence matters because each layer of a room informs the next. Paint before you hang art. Find your wall studs before you fall in love with a shelf placement. Arrange the furniture before you buy a rug — because the rug size that works depends entirely on where the sofa lands. DIY home decor projects that feel impulsive and expensive usually are impulsive, not expensive. The budget version of these mistakes is time lost and patched mistakes. The expensive version is a rug you bought before you knew the room.

How to Actually Start — The Right Order
DIY home decor works best when you follow a specific sequence: start with the room's fixed elements (light sources, architectural features, outlets), then arrange furniture, then choose the rug, then paint, then shelving and storage, then art and accessories last. This order prevents the most common costly rework — buying a rug before the sofa has a permanent home, or painting an accent wall before you know where the shelves will go.
Here's the practical sequence, done right:
- Map your light first. Where does natural light enter? Which walls are bright and which are dim at 6pm? This determines where your statement pieces go and whether a dark paint color will work.
- Lock the furniture arrangement. Try at least two configurations before committing. Photograph both. Only then buy the rug.
- Choose the rug by furniture, not by floor. The front legs of every main piece of seating should sit on it. That usually means going one size up from your instinct.
- Paint before you hang anything. Even floating shelves. Even the art you're certain about.
- Install fixed elements next. Shelves, curtain rods, hooks — anything that needs a drill.
- Add textiles and lighting. Curtains, throws, lamps. These soften the hard lines of the fixed elements.
- Accessories last, always. Once everything else is in place, accessories fill the gaps. Not the other way around.
Three Projects Worth Doing (and Exactly How to Do Them)
Not all DIY home decor is equally worth your time. These three hit the best ratio of visual impact to actual difficulty.
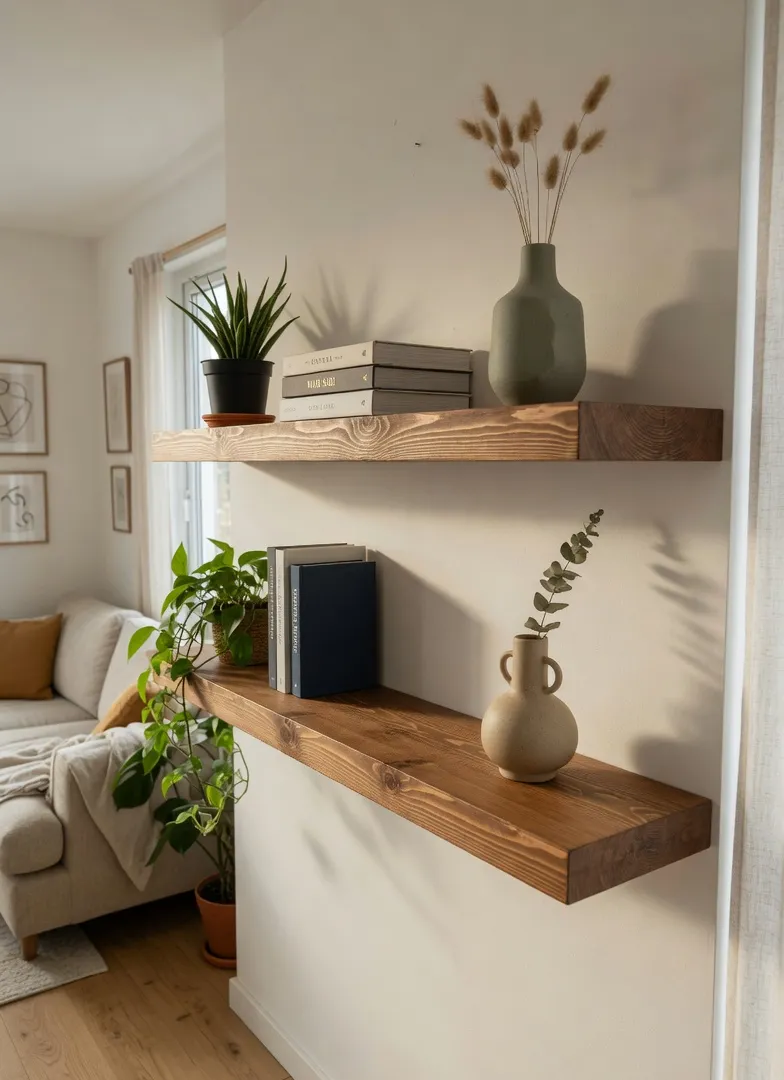
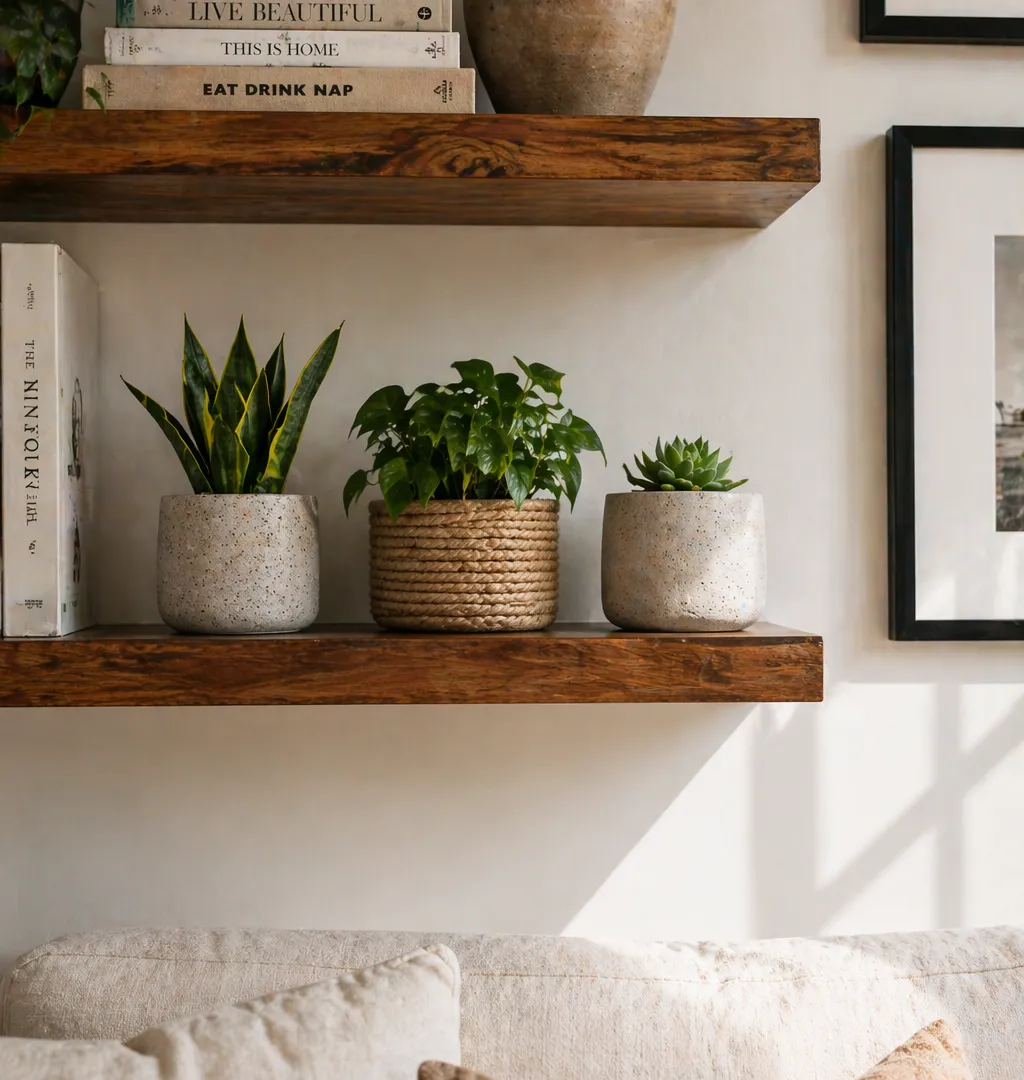
Floating Shelves
The appeal is obvious: storage and display without bulky furniture. The mistake almost everyone makes is treating stud placement as optional. It isn't.
Floating shelves that don't find wall studs — or that use only drywall anchors for heavier shelves — will pull out of the wall, sometimes taking a chunk of drywall with them. The studs are typically 16 inches apart, measured from the corner. A stud finder costs about $15 at any hardware store. Use it. Mark both stud edges, not just the center, because the screw needs to go into the solid wood.
Keep shelf width under 30 inches without a center support bracket. Beyond that, even solid wood will bow under weight over time. For brackets, choose concealed hardware if you want the "floating" look — L-brackets mounted to the wall, then the shelf slides over the top. The shelf sits completely flush and the hardware disappears.
For the shelf material itself: solid wood (pine or poplar) from a lumber yard will cost more than MDF, hold better, and take stain rather than just paint. A 36-inch pine board, 1×8 inches, runs about $12–18 depending on your market. Stain it in a walnut or oak tone, seal with polyurethane, and it reads as custom. The whole project — two shelves, hardware included — typically runs $40–70.
Style them in odd numbers of objects. Three vases, five books. The eye reads asymmetric groupings as more natural than even pairs.
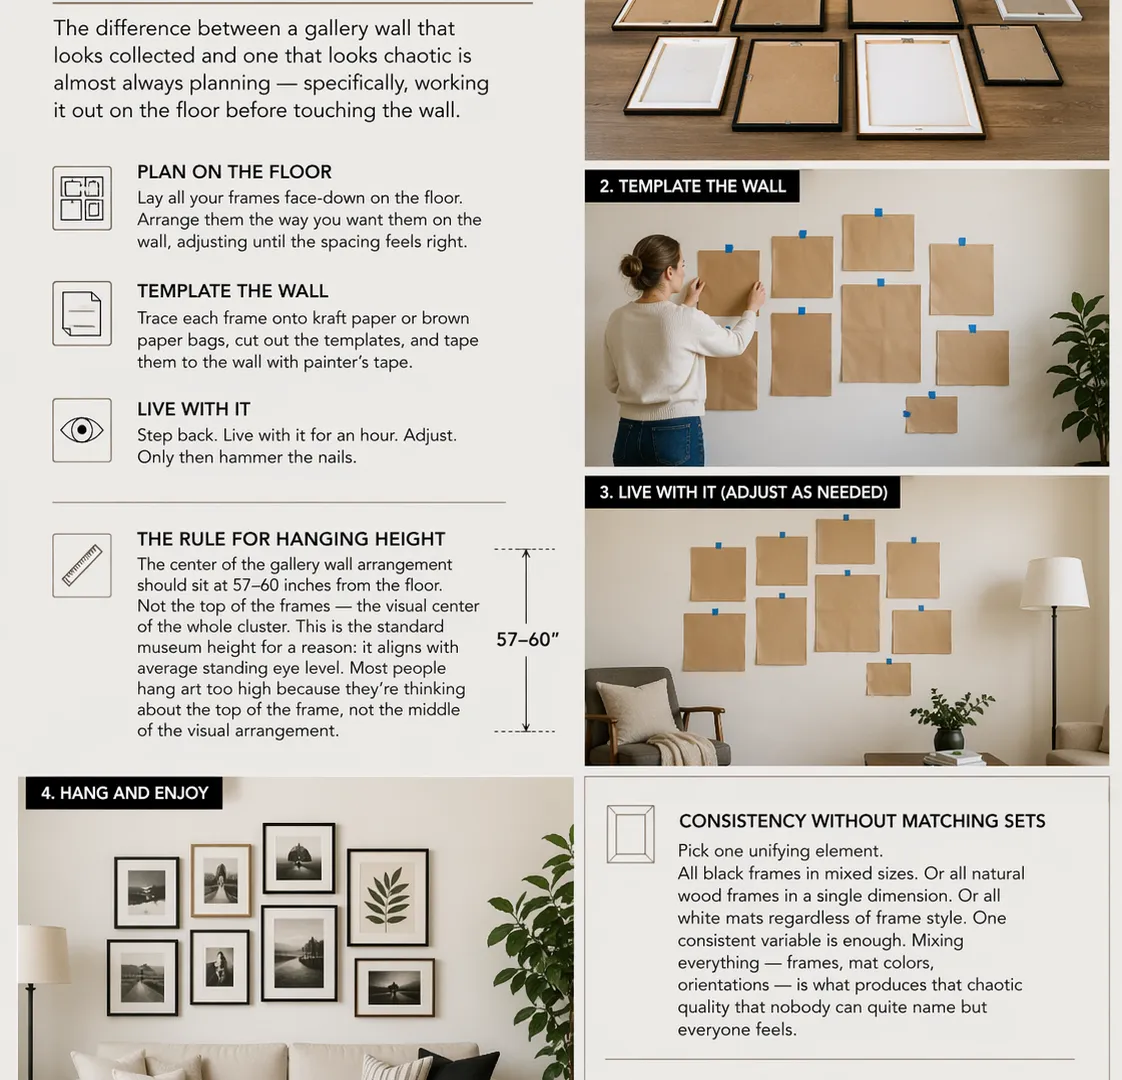
The Gallery Wall That Doesn't Look Accidental
The difference between a gallery wall that looks collected and one that looks chaotic is almost always planning — specifically, working it out on the floor before touching the wall.
Lay all your frames face-down on the floor. Arrange them the way you want them on the wall, adjusting until the spacing feels right. Then trace each frame onto kraft paper or brown paper bags, cut out the templates, and tape them to the wall with painter's tape. Step back. Live with it for an hour. Adjust. Only then hammer the nails.
The rule for hanging height: the center of the gallery wall arrangement should sit at 57–60 inches from the floor. Not the top of the frames — the visual center of the whole cluster. This is the standard museum height for a reason: it aligns with average standing eye level. Most people hang art too high because they're thinking about the top of the frame, not the middle of the visual arrangement.
For frame consistency without matching sets: pick one unifying element. All black frames in mixed sizes. Or all natural wood frames in a single dimension. Or all white mats regardless of frame style. One consistent variable is enough. Mixing everything — frames, mat colors, orientations — is what produces that chaotic quality that nobody can quite name but everyone feels.
Budget: a decent gallery wall in thrifted or budget frames runs $30–80 for eight to ten frames. IKEA's RIBBA frames in black or white — $3–10 each — work well and photograph cleanly.
Concrete or Rope-Wrapped Planters
The reason these are worth making rather than buying: the cost gap is genuine. A concrete planter at a home goods store runs $30–50. Made at home with a bag of quick-setting concrete and perlite (for lightness), each one costs about $3–5. The technique involves two nested containers — one slightly smaller than the other — with concrete poured between them. After 24 hours of curing, the outer container peels away. The result looks like something from a boutique.
For rope-wrapped planters, the base is even cheaper: a plain plastic pot from any garden center ($1–3). Jute rope and a hot glue gun are the only other supplies. Start at the base, work upward in tight coils, gluing every three to four rows to keep it secure. The process takes about 45 minutes per pot. Total cost: under $8 per planter versus $25–45 for the equivalent from a home decor store.
Both work best in groupings of three, in mixed sizes. Height variation is what keeps a grouping from looking like a lineup — one tall, one medium, one low.
The Projects That Look Easy and Aren't
Worth naming clearly so you're not surprised.
Peel-and-stick wallpaper in rooms with texture. On smooth, painted drywall, it works. On textured walls — which is most walls built before the 2000s — it doesn't adhere evenly and lifts at the edges within months. Before committing to a full wall, test a small piece in a low-visibility corner and check it after two weeks. If it's lifting already, save the effort.
Painting furniture without proper prep. The projects that fail here almost all fail the same way: skipping the sanding step. Paint needs something to grip. Slick factory finishes on furniture, especially anything laminate or melamine, will peel within a month unless you sand first (150 grit is enough) and use a bonding primer before the topcoat. The sanding step takes 20 minutes. Skipping it means doing the whole project over.
Drop cloth curtains — often cited as a budget shortcut, and they genuinely are (a 9×12 drop cloth makes two full-length curtain panels for about $25) — but they wrinkle badly out of the packaging and require a hot steam iron before they'll hang cleanly. The wrinkles will not fall out on their own. Budget an extra hour for this step or the curtains look like a tarp.
The common thread: these projects are quick when they go right and expensive when they go wrong, usually because of one skipped prep step. The prep step is always the one that feels unnecessary when you're excited.
What Your Room Needs Before Any Project Starts
The single most common reason DIY home decor projects land flat — even well-executed ones — is lighting.
Overhead lighting alone produces flat, unflattering light that makes even good work look mediocre. Before any project: add at least one floor lamp or table lamp. In the 2700K range — warm white, the color of candlelight — not the 3000K or higher you'll often find in default fixtures, which read slightly blue and cold. The difference on a warm paint color, a stained wood shelf, or a terracotta planter is significant. At 2700K, earthy tones glow. At 3000K, they look dull.
A single floor lamp, well-placed, often makes more visual difference than a day of DIY work. That's not an argument against the DIY work — it's an argument for doing the lighting first so you can actually see what the rest of it looks like.
Secondarily: clutter removal. This costs nothing and produces an immediate before/after effect. One cleared surface reads as intention. Five items on a shelf that used to hold twelve reads as style. The objects don't change, the density does.
The DIY Upgrade That Costs Almost Nothing
Hardware. Specifically, cabinet and drawer hardware.
Replacing all the cabinet pulls and knobs in a kitchen or bathroom — with consistent hardware across every piece — takes about two hours with a screwdriver and costs $30–80 depending on the hardware you choose. The before/after is disproportionate to the effort because mismatched or dated hardware is visually louder than people realize until it's gone.
The rule: pick one finish and stick to it throughout the room. Brushed brass if you want warm and current. Matte black if you want graphic and modern. Satin nickel if you're playing it safe. Mixed finishes — which is how most older kitchens end up — register as unfinished even when the room is otherwise well-decorated.
For about $50 in hardware, a decade-old kitchen reads differently. No painting, no drilling, no new furniture. Just consistency in a detail that most people stopped seeing.
And that's most of what DIY home decor actually is: noticing the things you stopped seeing, and deciding which of them are worth fixing.
About the Author: Elena Vance
Interior design enthusiast and DIY expert. Elena Vance has spent over a decade curating spaces that blend modern aesthetics with everyday functionality. Passionate about helping you create a home that tells your unique story.
